conduit help

Talk Electrician Forum

Help Support Talk Electrician Forum:

This site may earn a commission from merchant affiliate links, including eBay, Amazon, and others.
Doc - how about making this a new post - it's too good to be lost in the depths. Even a sticky in student and learning?
I agree Patch.

There are some people who have made some great threads dedicated to the AM2.

Maybe someone can combine them all (and possibly add more) Inclusive of your Pics, Alan? (I will watermark them for you) and put a "Fact Sheet" together and I will save it as a PDF and add it to the 'Download Area'.

It would be good if it could be split into sections reather than have it as one contious massive page.

Have you any time, and would you be interested in doing that Alan? I understand if you can't or unable to.

Best wishes,

Admin.

PS. I have already put a section on the AM2 in the download section anyway - so it will be just a matter of adding all it to it in the right order.

 
PS. Where you describe the various methods of conduit bending - I can take the diagrams from the ones that M107 have posted in the downloads Area and send them to you - or add them for you.

:)

Time consuming - but I know it will be well worth it in the end. :x

[EDIT: I just saw your post with regards to uploading you 10 pics. :_| ]

 
Top info like it, also like the idea about turning it into a fact sheet. The only tiny bit of info I can think of to add is on thread cutting, a standard conduit end with bush and lock ring will require 13 threads, (so I was taught anyway), 11 to go 1/2 way down the bush and 2 for the lock ring. We use to but a bit of tape on one side of the die stock so that it was easier to keep track of amount turns when threading, also wind the stock back a 1/4 turn every turn to break of the swarf.

Cheers Steve

 
Top info like it, also like the idea about turning it into a fact sheet. The only tiny bit of info I can think of to add is on thread cutting, a standard conduit end with bush and lock ring will require 13 threads, (so I was taught anyway), 11 to go 1/2 way down the bush and 2 for the lock ring. We use to but a bit of tape on one side of the die stock so that it was easier to keep track of amount turns when threading, also wind the stock back a 1/4 turn every turn to break of the swarf.Cheers Steve
Hi Roys,

that bit is coming next....

 
Ok.

nearly there now with a quick re-cap.....please refer to the AM2 picture at the top of this thread

i have done a 10mm dog leg, the first bend at the top where it turns left. I have also done the second bend so the tube now turns out towards the light.

this is a common question from my students....."how do i make it exactly the right length alan?" When i show them there is a look of amazement around the workshop, but with a tinge of embarrassment. This is how you do it....the "magic" measurement here is 16mm, which is the length of a thread. ( it goes therefore that a coupling must be 32mm)

take a measurement from the back wall to the face of the fitting. i will make one up of 400mm. now lay the tube up against a wall or straight edge and take a measurement from the wall of 394mm. remember the conduit is not lying against the wall, it is held off by the depth of a saddle which is 6mm.

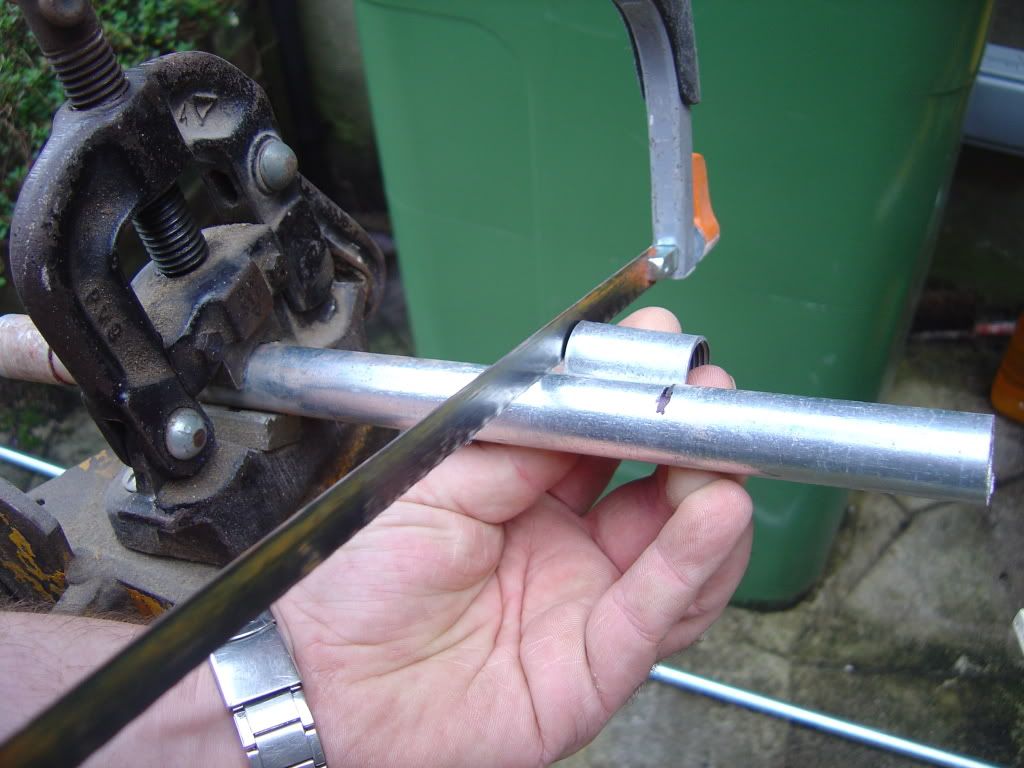
Stage 1 Get your hacksaw and put a scar in the tube on that 394mm mark

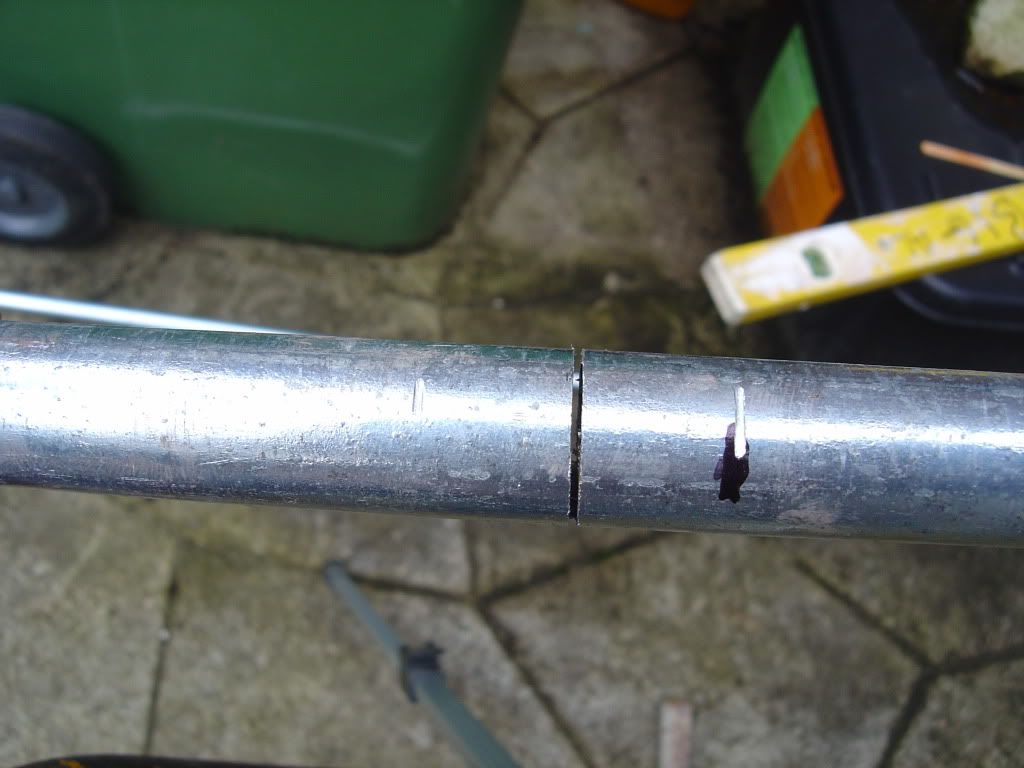
Stage 2 Carefully hold the coupling round the back of the tube and mark the tube like me, this being the inside mark. This one is vital, as you will see shortly

Picture130.jpg


Stage 3 Now you should have two marks on the tube, the distance between these being the length of a coupling. next you get your saw and cut, by eye between the two marks. Here i have nearly gone through to complete the cut. that black mark on the right is the 394mm mark

Picture132.jpg


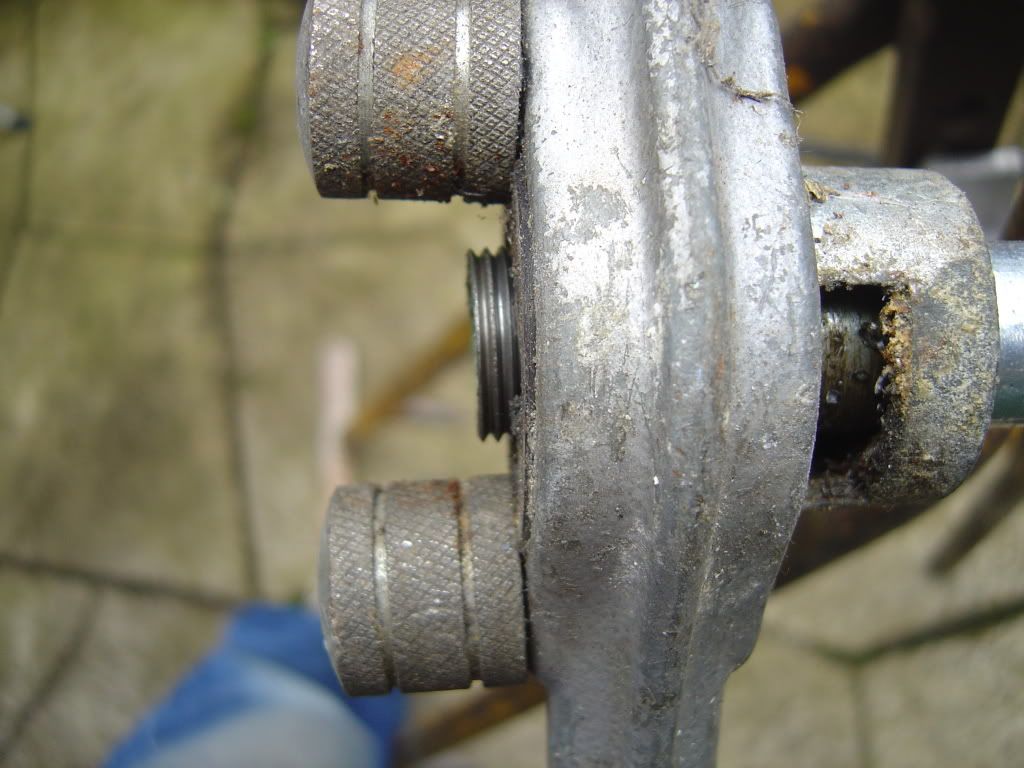
Stage 4 Right, nearly there now! you get your compound and stock/die on the job and keep threading till three full threads are sticking out the back like this....

Picture134.jpg


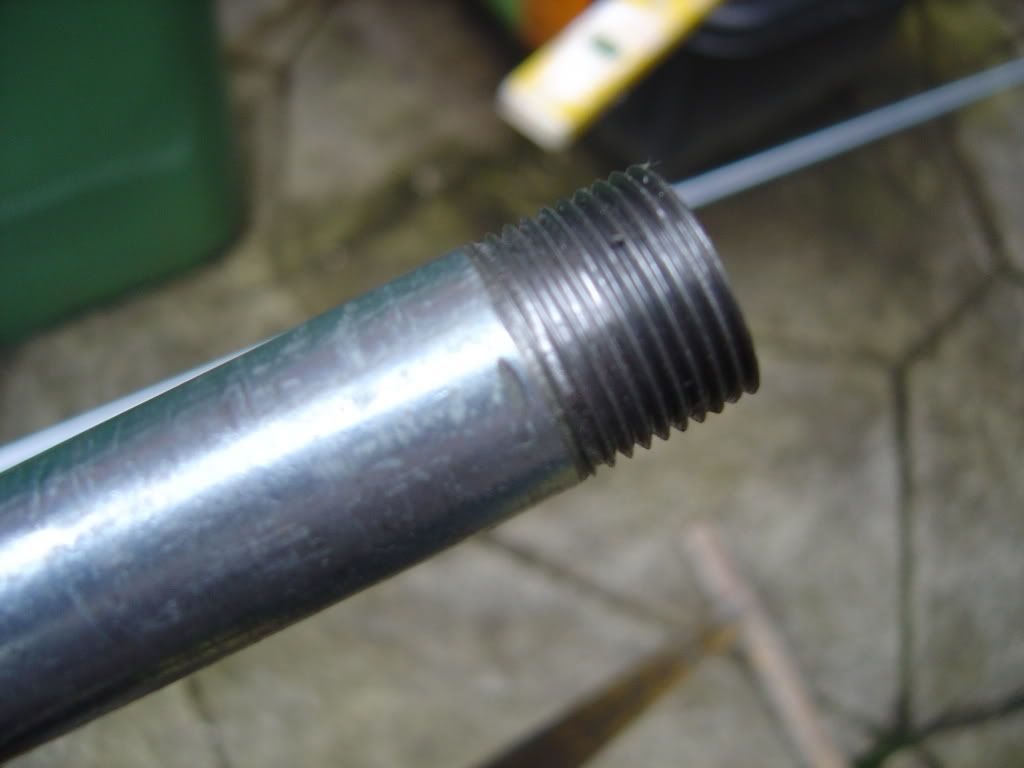
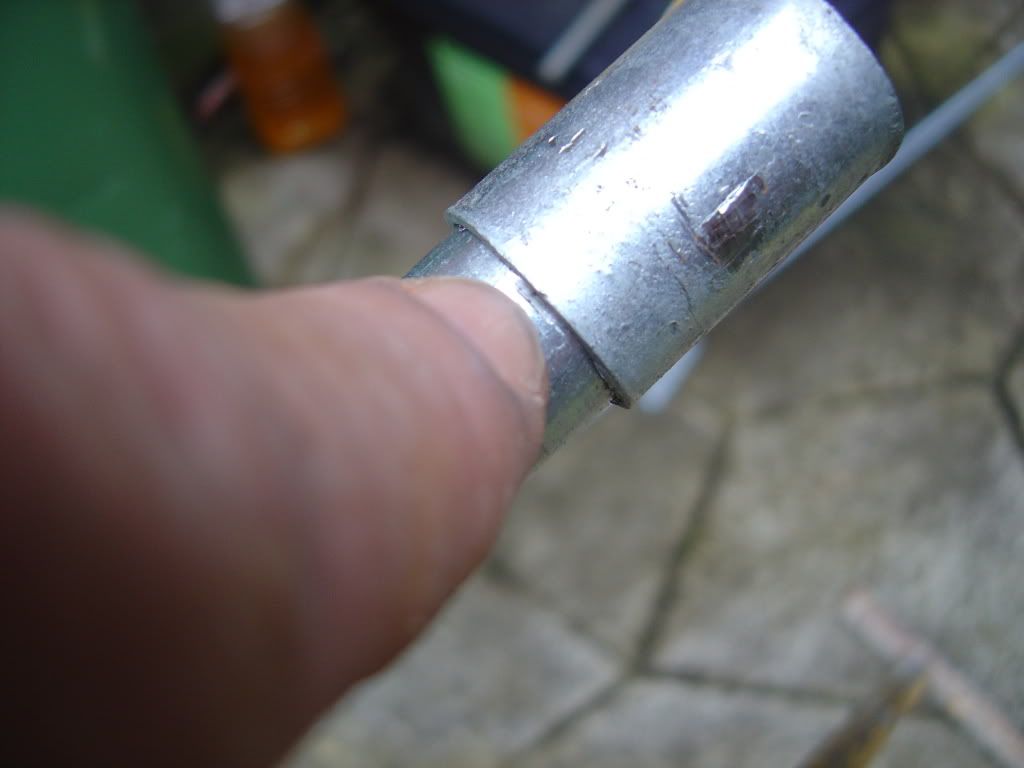
when you spin off the stock you should be confronted with this sight, and then it should all become obvious where we are heading with this exercise...

Picture136.jpg


Stage 5 now all you do is screw on the coupling and tighten it to that little scar you did earlier and voila! It has to be right

Picture137.jpg


As i said at the top clever but simple!

At this stage now the conduit should pop straight in on your AM2 and the bushes should engage without any effort....

When I did the AM2 trailer job that is pictured at the top of this thread, there were all identical bays...i measured one and made 6 and they all fitted

the man who taught me this spent a few years as the chief electrician on the QE2 and later was a tutor at that norweb training school i had to go to.

he always stated that conduit installations should be to a tolerance of +/- 1mm as this is the width of a hacksaw blade.

to the OP i say practice and confidence makes perfect. ;)

 
Hi Admin

Have i C***** this up? i have big pictures rather than links:coat

 
Looks good to me. Links are a PITA, pics inline are better.

Top job BTW, although I have done a lot of galv tube a lot of is slightly less than exact. I was looking for a couple of galv jobs to do anyway to bone up a bit. :)

 
Cock up or not I find its very good explanation of a sadly dying part of installations these days.

Most industrials now use armoured as a preferred method.

I do miss going home stinking of milk and swarfe :)

 
Hi All

I was in college today and had to take a class that are sitting their AM2 in a couple of months. They have never had a proper conduit tutorial so I put one on for them.

I marked out, mounted boxes and saddles to resemble the AM2 fitting described above. I then took all the measurements remembering to knock off the 6mm here and there. :z Anyhow i made the tube and fitted it as a "and here is one i did earlier" like blue peter! the other reason i did it was to time myself, as i never do.

i did it, plodding on but not stopping for a fag break, in 22 minutes.....

i then bent a second one as a demo for the class and it fitted straight in:O it is a damning indictment that they are learning this sort of thing at this stage of the game:_|

oh and by the way, next monday is their turn...... :D

 
so all my beds on this will be back of bends?and i bend these by putting my square on the outer edge of the foremer not on the inside groove?

 
I have been doing at college PVC conduit and bending that, Its soo hard to do. I can just about make a 90 degree bend but bumps are well hard. You have to bend it over your knee and my knee has all bruises on it now from forcing the pvc to bend over my knee.

Any easier ways to do it?

 
so all my beds on this will be back of bends?and i bend these by putting my square on the outer edge of the foremer not on the inside groove?
Hi,

The square on the outer edge of the former would be to "back of bend".

Some put the square on the inside groove of the former, this would be to the "inside of the bend"

 
I found a great way of doing my conduit asessement (back in the day) go to scrap bin, find a set of nicely bent bends (that someone else just made for theirs and have since been dismantled), assemble and present your work to the tutor and get a good mark. Job done.

Disclaimer - I do not condone any cheating.... don't do it! I have since changed my ways :)

 
I found a great way of doing my conduit asessement (back in the day) go to scrap bin, find a set of nicely bent bends (that someone else just made for theirs and have since been dismantled), assemble and present your work to the tutor and get a good mark. Job done. Disclaimer - I do not condone any cheating.... don't do it! I have since changed my ways :)
And this coming from a man of the cloth.

:eek:

 
Confession is good for the soul........

Did I tell you about the bloke who went to confession after not going for a very long time? He went into the confessional box and to his surprise there was a bar, Guinness onb tap, a large array of Cuban cigars...... He was interrupted by the Priest "Gerrout of there - thats my side"........

 
one more question before my exam 2morro,im cackin it lol.am i not better using my light as my fixed pont and going from there cause my conduit is already threaded and got a coupler on that way

 
one more question before my exam 2morro,im cackin it lol.am i not better using my light as my fixed pont and going from there cause my conduit is already threaded and got a coupler on that way

 
started am2 today conduit spot on thanks doc.how time flys when your in there tho.mi sockets and bonding to do gona be close

 
Top